


Before, I mentioned coming up with my own jewelry organizer……and so…..I HAVE!!! I have gathered a variety of ideas from projects other people have posted and found what I liked and combined different ideas to create one perfect for me.
So let’s get started….
There are two parts.
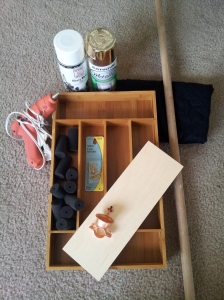
Supplies (Part 1):
Cutlery Tray
Wooden Dowel
Black and Gold Spray Paint
Cup Hooks
Fabric
Hair Rollers
Sand Paper
Bell Hanger
Plywood Sheet
Hot Glue Gun
Hacksaw
A few of the items I already had, so the price was not a concern for me. If you want to keep it on the less expensive side see what you already have, what you can use to improvise, and go shopping in family and friends’ garage.
PART 1
Step 1
I measured out a piece of the plywood to fit right in the center of the bottom horizontal opening for a divider. Then, I cut it out with the hacksaw and secured it in place with the hot glue gun. (This piece is important for the bell hanger considering how long the screw for it is. If you will not be using the bell hanger, then it is not necessary.)


Next, I measured out the wooden dowel to be no longer than the width of the tray, cut off the access and sanded both ends.
Step 2
My color scheme is black and gold. Therefore, I spray painted the bell hanger gold; and the cutlery tray, wooden dowel and plastic canvas black.
Step 3
While those items are drying, I started on the ring holder.
First, remove the plastic rod pieces from the foam rollers. Then cut pieces of fabric the same length as the rollers and large enough to go around the rollers with enough for just a bit of overlapping. Run a line of hot glue along the edge of the fabric lengthwise. Carefully glue the roller piece down. Roll the fabric around the roller and add another line of glue to the edge, securing the roller. The roller should be covered except for the ends.


(Now, make sure your cutlery tray is dry and that it does not need second coat of paint before continuing rest of the step. It’s also a good time to check and see if any of your other supplies need another coat as well.)
Run a line of glue over the section of roller that has the fabric edge (underside) and press into your chosen section of the cutlery tray, making sure it is snug against top edge of tray. Repeat with remaining roller pieces, making sure to space pieces evenly and making sure they are snug. If there are any pieces of fabric bunched up, just take something thin and push the edges of the fabric down.


Step 4
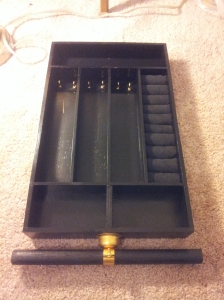
Now its time to screw in the cup hooks into the remaining slots. (Note: You can also use eyelets or more cup hooks if you chose as well. It’s at the discretion and needs for you jewelry.) I wish I had a drill when I first started but believe by the end I borrowed a friends. If you have a drill, get a hole started for you so it can be easier to screw in the hooks. If not, well join the party in the hard way.
What I had to do was use a bigger screw to start each hole and use some downward force to screw in the hooks. At a certain point my I could not twist anymore and my hands were too big for the space so I used needle nose pliers. Just be careful not to bend the hook part. (I almost snapped a hook off one.)


Step 5
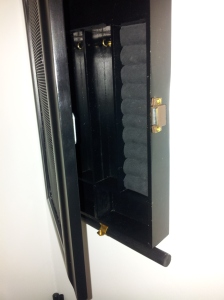
I then screwed in the bell hanger into the bottom center piece we added earlier. (I had to end up using a shorter screw because without a drill I could not get the screw to go all the way through.) Then put the wooded dowel through the center and screwed it the bell hanger closed.


Step 6
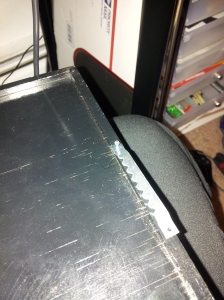
Nail in the saw tooth picture hanger in back. (Or you can screw it directly into the wall right through the center of the top compartment. My wall did not allow me do to so.) IF YOU ARE DOING PART 2 DO NOT ATTACH TO WALL YET.
PART 1: FINISHED
NOW FROM HERE IF YOU CHOOSE TO YOU CAN STOP AND BE DONE WITH THE JEWELRY BOX, BUT I AM REALLY EXTRA SO i ADDED A LITTLE SOMETHING EXTRA. I WANTED IT TO BE MORE LIKE A CABINET SO I ADDED A DOOR. SO HERE IS PART 2!
Supplies (Part 2):
Picture Frame
Plastic Canvas
Hinges
Hot Glue Gun
Variety of Screws
Drill
Step 1
I took a picture frame and some plastic canvas to make an earring holder.
First, I cut the plastic canvas to fit the back of the frame. Then used the hot glue gun to secure it to the back of the frame. I used a lot of glue as you can tell from the picture. I wanted to make sure it was secure.


Step 2
Before beginning this step I suggest you temporarily remove the wood dowel because it may get in the way. ( I know it got in my way at times.) Also by this time, I borrowed a friend’s drill because you really need pilot holes. It makes life a 100 times easier.
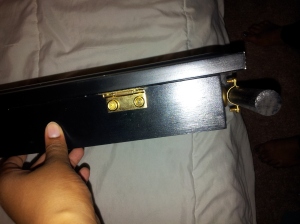
Next, I attached two hinges to the cutlery board and then our newly made earring holder. This will act as a cabinet door to the tray. (Note: Pay attention to how long your screws are so that they do not go all the way the through to the wood. )
Step 3
Attach a magnet on the opening side to secure it close for when not in use.
YAY! WERE DONE!
I still have too much jewelry that I have to build another one, maybe two. Feel free to ask any questions and leave any feedback. Thanks.
~Laverne

